|
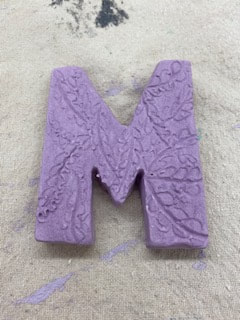
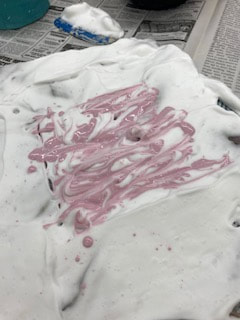
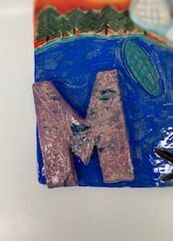
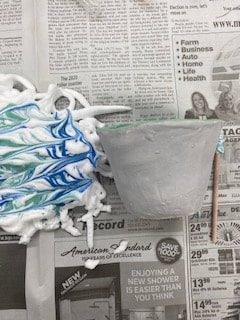
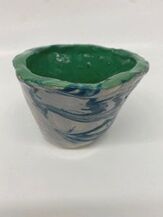
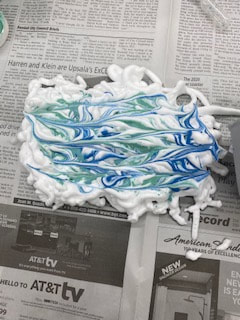
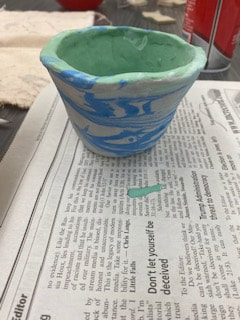
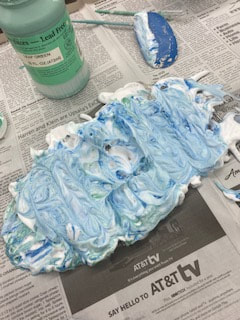
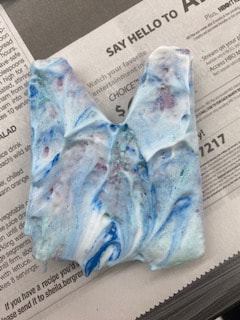
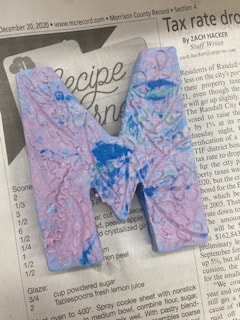
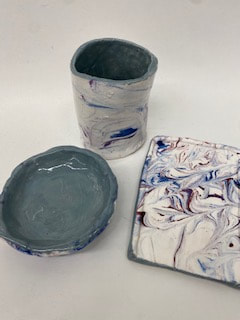
A new skill that I tried was glaze marbling with shaving cream. For research I first looked up pictures to see how it would turn out and what kind of piece would look good with the marbling. Then I watched two different videos that showed me what I needed and how to use the technique. Both videos showed very similar processes. First they both had newspaper or something put down to protect the table. The process was very simple and you only need a few things. The supplies needed are shaving cream, glaze (I used underglaze), suction tube thing to pick up the glaze, a stir stick to make the marbling design, your clay piece, something flat to make the shaving cream even, and a sink to wash off the shaving cream. On my first piece I tested I used my "M" from my relief tile. I used purple underglaze before I fired it the first time and then I did the marbling technique. I set up my area and protected the table with newspaper and then I got my shaving cream and put a good amount on the newspaper. I made it even with my blue scraper and then I used my squeezer thing to get blue underglaze out of the bottle and put it onto the shaving cream. Once I had enough glaze on the shaving cream, I took my stick to swirl around the glaze to make a marble design. Once I had my design I took my piece and rolled it in the shaving cream. Once it was all covered where I wanted the glaze to go I rinsed off the shaving cream. Then I let it dry, and fired it. After that firing I finished it with clear glaze and did a final firing. After that test piece I was going to do another test piece before I did my final piece. I used a cup like piece that I will use to hold jewelry. I really like how this one turned out. I started a bowl for my final piece and I used black underglaze and was going to use a white marbling. I did the process and when I went to wash it off, it didn't work and the glaze washed right off. I had another piece that I had not glazed to see if I could get it to work on that and it washed off that too. I was very frustrated and didn't know what I was doing wrong. I gave up and decided to use the "M" as my test piece and the jewelry holder as my final piece. With the pieces that it didn't work with, I glazed them with colorburst and still made them look pretty cool. After giving up with the technique I decided to give it one more goal with my set. I am so glad that I didn't give up because I love how the set turned out with matching marbling. I learned that sometimes new things are frustrating when they are not working out and you don't know what you are doing wrong. I learned to not give up and keep trying. I also had a lot of fun trying this technique and this project made me enjoy the class more. I am super happy with how the outcome of these pieces turned out and I am glad I found a fun technique to use on my set project.
0 Comments
Leave a Reply. |
AuthorI am currently a highschool student and I will graduate in 2022. I am involved in tennis and softball. Archives
June 2021
Categories |

 RSS Feed
